

Ride or delivery ETA
Minutes until a ride or delivery arrives, with the driver, the vehicle and an optional Message button.
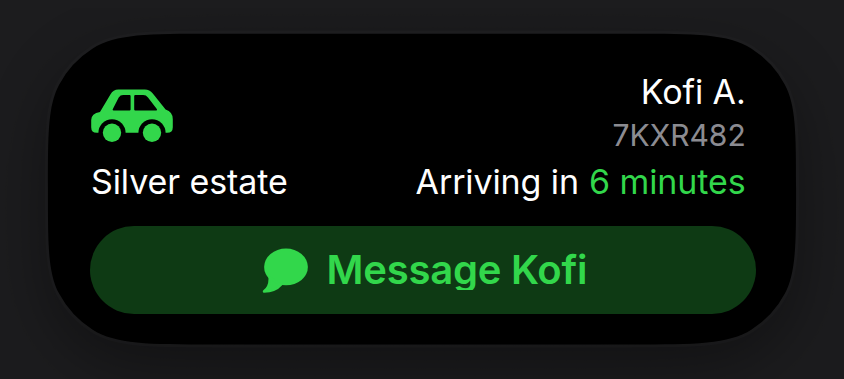
An arrival countdown, laid out the way the platform’s design guidelines draw a delivery. Pass when it gets there and the minutes count down on their own.
Install
npx shadcn@latest add https://islandcn.dev/r/eta-activity.jsonpnpm dlx shadcn@latest add https://islandcn.dev/r/eta-activity.jsonyarn dlx shadcn@latest add https://islandcn.dev/r/eta-activity.jsonbunx shadcn@latest add https://islandcn.dev/r/eta-activity.jsonThis writes components/islandcn/eta-activity.tsx, plus the content kit and the engine if the project lacks them. Mount the island once first, see Installation.
What it shows
- Compact: a car (ride) or parcel (delivery) glyph (or a short
servicename) and the minutes left (“6 mins”), both in the accent, the colour the expanded car and minutes carry, so opening it keeps one colour (aservicename stays white). - Split: its compact pair, as the reference phone shows it, in the pill or in the 62.18 wide capsule. When the pair is too wide for the split, the fallback is the glyph and the minutes.
- Expanded: the vehicle glyph large in the accent, tight to the top-left corner beside the camera area. On the right, the driver’s name, with the plate in grey under it, or stars when you pass
rating. The next row has the car (or what is coming, such as “3 items”) on the left and “Arriving in 6 minutes” on the right, with the minutes in the accent. WithonContact, a full-width capsule at the foot reads “Message Kofi” beside a message glyph, in the accent on an accent tint. - Older props: without
driverName, the plate takes the name’s place. A ride’ssubtitleof “plate · car” fills the plate and the car.progressis still accepted, but nothing shows it: the guideline layout has no route bar.RouteBaris still exported for your own layouts. - Updates: the minutes turn over their digits with the engine’s
IslandNumber.
Usage
"use client";

import { EtaActivity } from "@/components/islandcn/eta-activity";

interface Ride {
  /** Arrival time, in ms since the epoch. */
  etaMs: number;
  driver: string;
  car: string;
  plate: string;
}

export const RideIsland = ({ ride, onMessage }: { ride: Ride; onMessage: () => void }) => (
  <EtaActivity
    kind="ride"
    arrivesAt={ride.etaMs}
    title="Driver is on the way"
    driverName={ride.driver}
    plate={ride.plate}
    vehicle={ride.car}
    onContact={onMessage}
  />
);
Props
arrivesAtnumber
When it gets there, epoch ms.
numbertitlestring
Headline, such as "Driver is on the way". Read by screen readers; shown top right only when there is no driver name or plate.
stringdriverName?string
Who is coming, such as "Kofi A.", top right.
stringplate?string
The plate, under the driver's name or in its place.
stringvehicle?string
What is coming, such as "Silver estate" or "3 items", on the left of the arrival row.
stringonContact?() => void
Shows the full-width Message capsule and is called when it is pressed.
() => voidcontactLabel?string
The capsule's words, such as "Contact Juan C.".
string"Message <first name>"rating?number
A rating out of 5, in halves: stars under the name in place of the plate.
numberservice?string
A short service name for compact's leading side, in place of the vehicle glyph.
stringkind?"ride" | "delivery"
Picks the glyph.
"ride" | "delivery""ride"subtitle?string
The older form of plate and vehicle: "7KXR482 · Silver estate" for a ride.
stringprogress?number
Still accepted, no longer shown.
numberaccent?string
Accent colour: the glyph, the minutes and the capsule.
stringgreen for rides, yellow for deliveriesid?string
Activity id.
string"eta"priority?number
Higher priority takes the main pill when two activities run.
number0Make it yours
Install this preset when it is exactly what you need. Otherwise open it in the Playground, change what each region shows and copy the code, or read its source for technique and build your own island on the engine.